
How To Create A Yoga / Pilates Website Using Wix In 10 Minutes?
Creating a Yoga or Pilates website these days is quite quick and easy. You don’t need to learn any coding or technical knowledge to build an online website because many website-building tools and sites offer you awesome ways to create a yoga or pilates website.
One such quite popular site is Wix. I have personally used Wix and found it quite easy to build a website. Also, the templates are quite trendy, categorically defined to make things easier for you.
Many of our clients at KRIYA Booking System want to build their yoga website using WIX. So we decided to show you in this guide how to create a Yoga / Pilates website using WIX in 10 minutes.
You can create your yoga website with Squarespace too.
Why choose Wix to create a Yoga/Pilates website?
The reason to choose Wix to create a Yoga/Pilates website is its simplicity of the interface.
- Wix offers an excellent drag-and-drop site builder to create small websites.
- There are 100s of free templates available.
- Wix provides its own web hosting as well as domain names (free and paid).
- The App Market makes it easy to add extra functionality, such as photo galleries or e-commerce.
- The layouts and designs are impressive.
- Suits best for small businesses and is designed best for online stores, online classes and creative people.
- Also, you can optimise your site with Wix for mobile devices. It can also be spiced up with one of the numerous apps available from the Wix app market.
- The Wix editor offers handy tools such as photo filters and animated texts.
- Moreover, everything is ready-made, all you need is to fill your own texts, images and videos.
- Last but not least, Wix is available for free for as long as you want. If you need professional features like your own domain name or eCommerce, or payment gateway, you must choose from one of their premium plans ranging from “Combo” to “Business VIP”. The cheapest ad-free plan with a custom domain name costs $11 -$15 per month.
How to create a Yoga website using Wix in 10 minutes?
Now that you are aware of some of the best features of Wix, let’s start to create a yoga website using Wix in 10 minutes.
First step: visit https://www.wix.com/ on your PC or laptop.
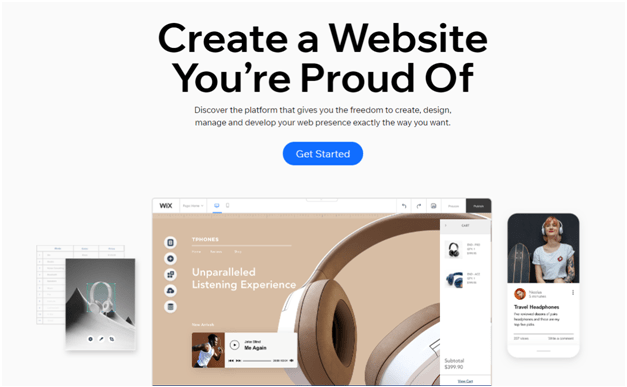
Now, click on Get Started (in the middle of the homepage) to build your Yoga Website.

You will get a page as shown above to sign up. You can type in your email and set a password for your Wix account to sign up at the site.
Or
Log in with your Facebook or Google account to begin.
Next, click on Sign Up.

Now Wix will ask you to answer a few questions to know you better.
Either use this question-answer format or skip it by tapping the Skip button, located on the right-hand side of the page in the footer.
If you wish to answer the questions, then Wix will ask you:
I want to create a site for – and there are answer options given, like for yourself or for a client or for others like for your company, etc.
The next question will follow: I want to create a site for myself. It should be ————–site. Now fill on the blank with answer options to choose in the drop-down menu, like for business, a fitness, an online store, etc.
After you have answered such questions from Wix, you are ready to build a website of your own.
You can choose to opt for custom text and images for your Yoga studio site by letting Wix ADI centre create a website for you, or choose one from the template and fill in your text and images, thereby creating your own stunning website in the Editor.
If you prefer the latter than there are hundreds of free templates to choose from for your website.

If you don’t want to do things manually, then choose the first option to get ready-made things.

WIX ADI will ask you what type of site you want to create, then you choose Yoga studio from the list of options given on the right-hand side of this question.
Then click Next.

Now it will ask you what you want in your website, like booking classes, pricing plans, chats, blogs and other such features.
Click on Next, and it will ask you what is the name of your business or website.

You can type your business name of website domain name that you have thought of
Click Next

Now the Wix ADI asks do you want to import your images and text.
To import content, copy and paste your links either from an existing website or Google Places.
Click Next

You now get your studio name, and you can enter your phone number, add your studio logo and other things.
Click Next

Pick a theme now from the given options and click on continue
Now pick your homepage design. Click on that design and start adding pages to it.
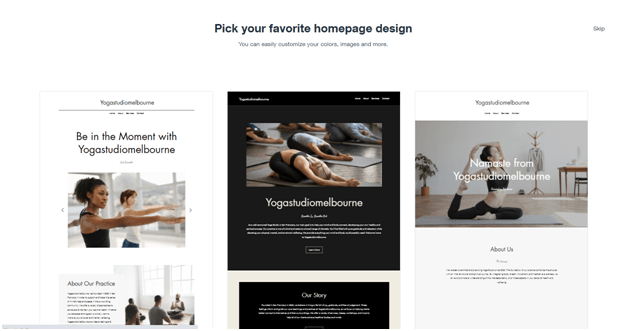
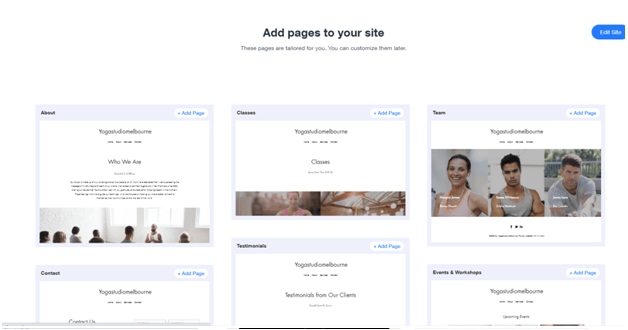
So far now your website is created.

You can start customising the site the way you want by clicking on the editing button on your website homepage.
On the top menu bar, you can click on Add so that you can add whatever you want. Click on design for themes, colours, fonts and more.

Go to the site button given on the right-hand side of the top menu bar. It will open up for more customisations and settings of your website that you have built.
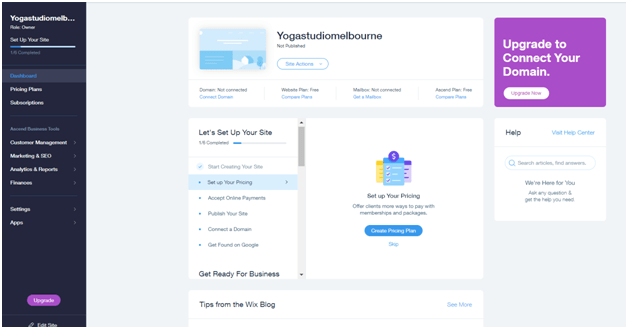
As your site’s home page has already been created for you by Wix, and includes sections that are relevant for your business. Click Preview on the top bar to see what the whole page looks like.
Structure of your Website
You also need to think about how you want your final site to look. You can choose to structure your site in two ways:
- Keep it as a one-page site with sections: the one-page site is a single-page site that is split into sections. As you scroll down the page, you can view the different sections. One-page sites are often very impressive due to their simplicity and organisation. They look modern and minimalist and are a great way to grab your site visitors’ attention! They are becoming more and more common and can be used to create a site for almost anything.
- Add more pages to create a multi-page site: You may decide that you want more than one page on your site. This option is usually better if you have lots of content that you want to put on your site, as you can create shorter pages. If you have Wix Stores, Wix Bookings or the Wix Blog on your site, you always have more than one page.
If you have an online store, bookings or a blog, then you already have more than one page on your site. Click the Pages menu on the top bar to see your pages.
Wix has loads of ready-made pages that they have created especially for you! Click here to learn how to add another page to your site.
Finally, preview and publish your site. When creating or editing your site, it’s important to see how it will look when it is live. Preview your site and browse through it, publish it to make it live and share your site URL.
The Premium Plan
Now it’s time to upgrade your site to Premium. This means you can go for the Wix subscription offer to connect your own personal domain name and remove the Wix ads! Wix offers several different Premium Plans for you to choose from.
To upgrade to a Premium Plan:
- Click Upgrade on the top bar inside ADI.
- Follow the instructions to upgrade your site.
Once you upgrade, you must assign a domain to your site. Note that Wix’s Premium Plans don’t include mailboxes, which can be purchased separately.

Click here to find the best premium plan at Wix for your website
If you need any help, simply go to https://support.wix.com/en/ from your PC or laptop and learn more about how to make your website more useful and add what you need to your website.
Conclusion
Ready to use your website for Yoga classes and bookings. If you are using any Yoga Booking System like KRIYA, you can add and create a KRIYA timetable too. Allow your students to book appointments and classes directly on your site with KRIYA Booking. If you already use KRIYA, add the link to your scheduling page, calendar, or appointment type.
Learn here how to add the KRIYA Timetable to your yoga website.
