The KRIYA Booking System has a feature that lists unpaid visits by business customers. This is a Resultant Report of Pay Later feature, which helps when a Customer wants to attend some Sessions / Visit on the spot; with our system, Businesses can Add the Customer and let them pay later.
This Report lists all the Customers who booked at the last moment and agreed to pay later. Businesses can then go through this list to clear all the pending fees for their customers.
Navigation to Unpaid Visit Report #
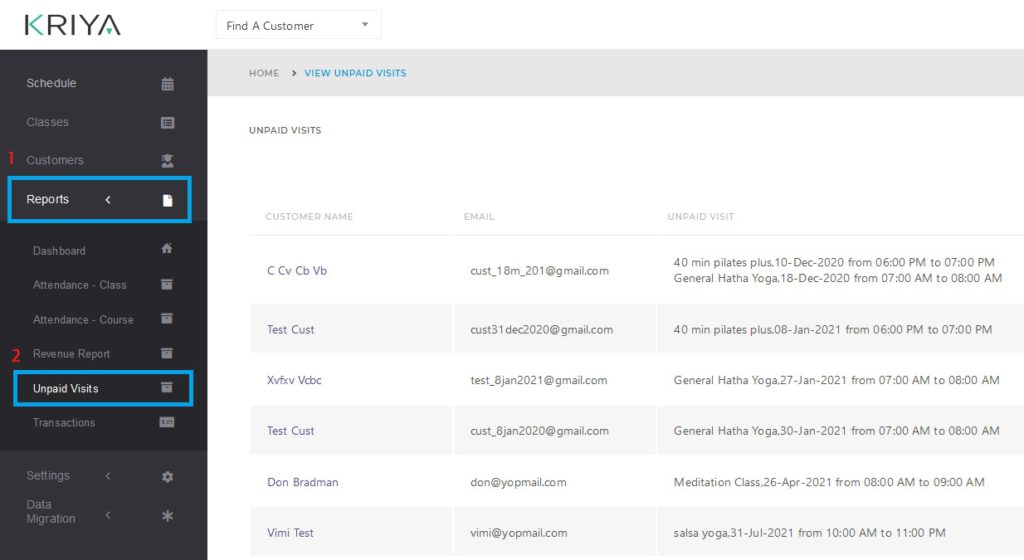
- Login to KRIYA. Click on Reports in the left Main Menu.
- Click on Unpaid Visits to reach the Report List page.
Data Columns & Filters for Report List #
KRIYA has a Minimalist approach towards Report Generation, with a necessary and clean style of information presentation for better understanding.
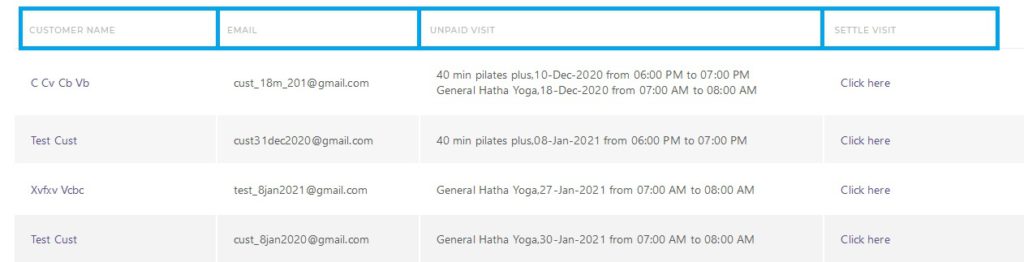
Unpaid visits have all the needed data columns, and each row shows information about a single customer, like customer name, customer email, unpaid visit details, and a settle visit link to that customer’s profile. Let us see them.
- Customer: Displays the name of the Customer who owes the Business for one or more visits.
- Email: Email Address of the Customer.
- Unpaid Visit: Here, you will see the details of the visits, like session name, date, and time.
- Settle: This column has the “Click Here” link, which takes you to the customer profile, where you can settle the visit fee with the customer.
KRIYA also has necessary Filters and sorting Options like the Search function, Show list, Display and Export. Let us see how to use them.
- Search Box: Here, you can search for anything you want about the report, like the Customer’s Email ID and the customer’s name. Anything in the column of the report is searchable.
Example: If I want to see people who booked a visit on 1st Jan 2021 and have not paid, I will type “1 Jan 2021” in the Search Box. I can also search for the time of the visit, like 8 am.
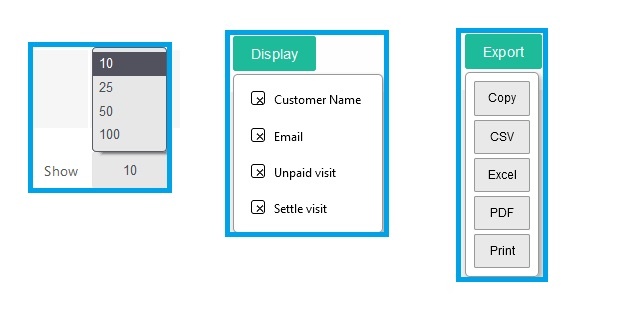
As the information has short forms of month names like “Jan” for January and “Jun” for June, type only the short forms to get the results. The same applies to other information as well. - Show List: This lists Numbers like 10, 25, 50 &100. Which Indicates the number of rows that will appear on a single page. If you select 50 in this list, only 50 rows appear on a single page.
Selecting more Results/Rows per page may take time to load, depending on your System’s Performance. - Display Button: Use it to Show and Hide columns in the Report. You can Check to Show and Uncheck to Hide the columns.
- Export Button: This Option will let you download all the data loaded with applied Filters and options. You can copy and download the list in CSV, Excel, or PDF format or print directly.
Only the data on all the pages will be exported, copied, or printed.